MC Forge Mod Dev Blog: Adding a Configuration GUI
Minecraft Forge had been shipping a configuration GUI framework which mods could use to provide customization options, but the framework has been gone since Minecraft 1.13. This post describes how I created a mod configuration GUI without using that framework by directly using APIs of Minecraft.
The procedure shown in this post is applicable to Minecraft 1.14.4 and 1.15.x. I did not check its correctness on Minecraft 1.13.x and old 1.14.x releases since those Minecraft versions do not have stable Minecraft Forge builds, but chances are the majority of the steps are also applicable to those versions. Nevertheless, I would recommend developing mods using only stable Minecraft Forge releases.
For Minecraft 1.16.x, please check this dedicated post for updated instructions.
For Minecraft 1.12.2 and earlier versions, you will need to rewrite the code in some of the examples. However, on those Minecraft versions, you can use the framework in Minecraft Forge directly, so there is no need to follow this post and create a configuration GUI with Minecraft’s API in this case.
Preamble for the Series
In this Minecraft Forge Mod Development Blog series, I will write some stories in the development process of my 2-year-old Minecraft Forge mod project, Hypixel Bed Wars Helper (HBW Helper).
This series serves two purposes: a personal one, which is for me to record how I came up with decisions on my mod and how I tackled problems and issues; and an altruistic one, for you and your fellow readers of those blogs to learn about Forge mod development if the information is useful to you. It is called a “blog” series instead of a “tutorial” series because what I will describe in here will mostly be ad hoc solutions to my specific issues. I will try to generalize them when it is manageable and appropriate so they will be helpful to you to the greatest extent. But, you might still need to do some things beyond copy-and-paste in order to solve the problems being described in the posts. This is why I do not think those posts will qualify as tutorials and thus call them blogs.
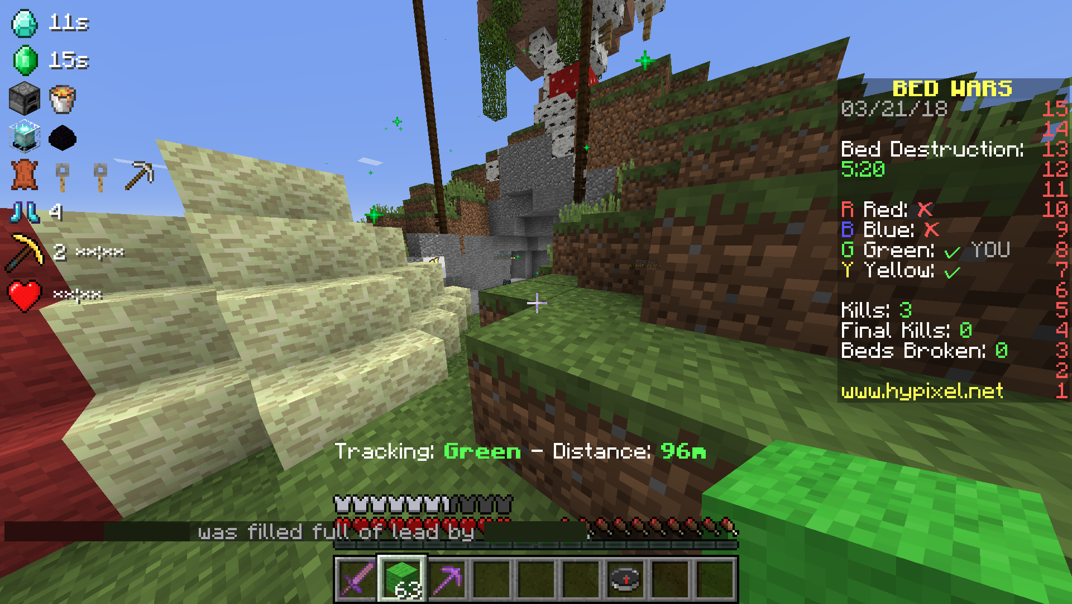
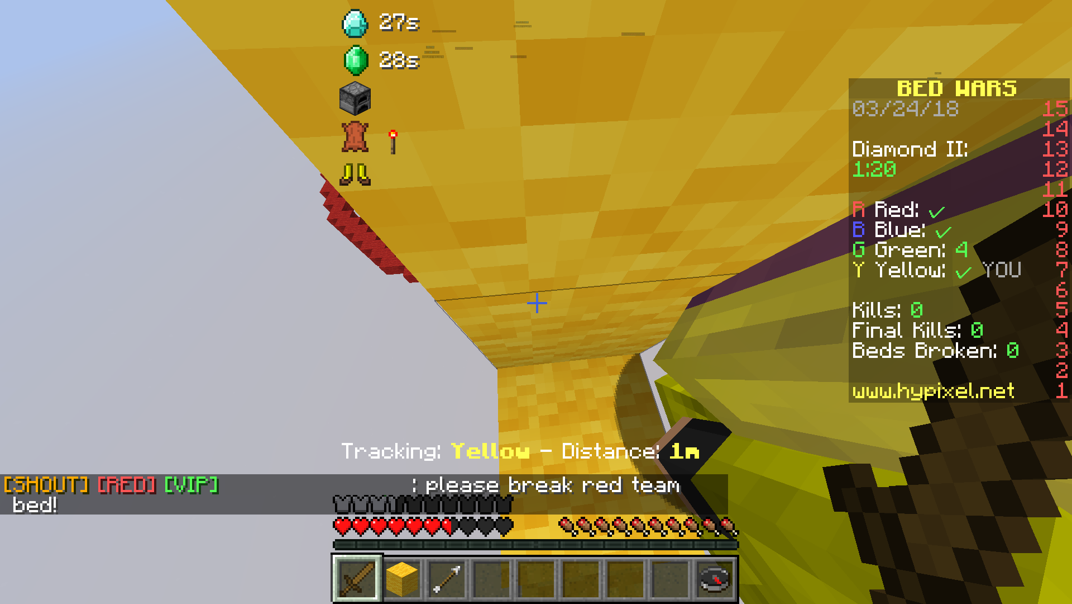
HBW Helper is a mod designed for Hypixel players who love the Bed Wars minigame on the server. It tracks and shows what upgrades you have got, when the next diamond and emerald spawn are, and so on. Those pieces of game information are presented directly on the HUD so you can find them very easily and quickly.
For this first post in the series, I plan to document how I came up with a mod configuration GUI being used on the latest versions of Minecraft and Minecraft Forge, which was the major highlight of the mod’s recent version 1.2.0 release.
Motivation
A Minecraft Forge mod may have its own configuration to allow for user customizations. For HBW Helper, as shown in the above screenshot, it displays the Bed Wars game information on the top-left corner of the screen, but users are allowed to move it to another location.
To make this happen, I added some configuration options that control the location of game information display. Now, a mechanism for changing the options should be provided to the users. When HBW Helper was still in development during early 2018, and 1.12.2 was the latest Minecraft version, Minecraft Forge contains a configuration GUI framework that mods can use to provide their own settings screens. It was not hard to use, so I merrily implemented my mod’s configuration GUI with it.
A few months later, Minecraft 1.13 was launched. Mojang changed lots of internal things in this update, which caused Minecraft Forge developers to work on porting Forge to 1.13 for a long time. The work was still incomplete when 1.14 was released, and as a result, no stable builds of Minecraft Forge were available for 1.13.x.
Finally, Forge developers released a stable version of Minecraft Forge for Minecraft 1.14.4. The massive internal changes introduced in Minecraft 1.13 had also reshaped Minecraft Forge: classes were renamed, and interfaces were redesigned. One notable difference was that the configuration GUI framework had been removed, probably because it must be rewritten for the changes in Minecraft, but it had never been added back. Because of this, the settings screen of even Minecraft Forge itself was gone. Its “Config” button in the mods list is now grayed out.
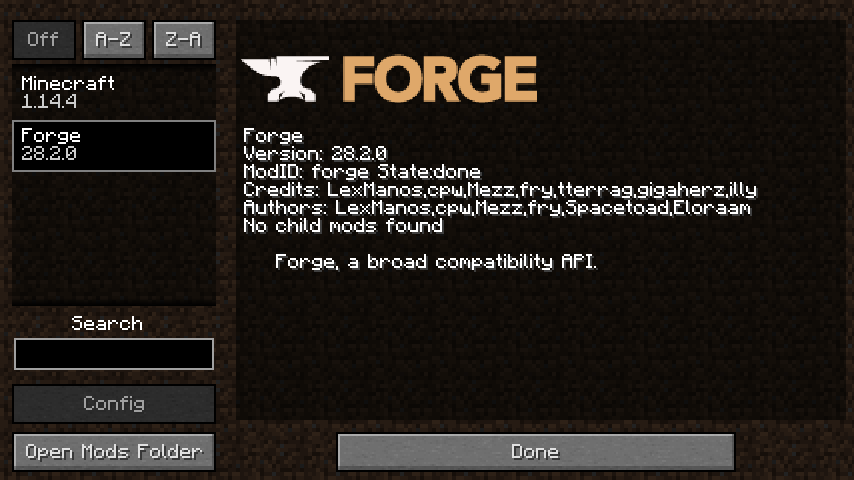
I noticed this issue when I ported my mod to Minecraft 1.14.4 in August 2019. My solution was a in-game command that manages mod settings, because I believed that the configuration GUI framework’s absence was only temporary due to the developers’ limited time and effort. My decision was to wait until those developers are able to bring the framework back, and use the command only as a short-term solution. The command-line interface’s usability is of course not better than that of a GUI, but thinking that it would not be permanent, I accepted the trade-off.

One year later, Minecraft Forge’s configuration GUI framework for the latest Minecraft version was still a work in progress from an external contributor, and the configuration command of my mod had exceeded its intended lifetime, so I finally decided to stop the infinite wait for the framework and invest some time in figuring out how to recreate the GUI without it. If it were not that external contributor’s effort on rewriting the framework, I would bet the core developers of Minecraft Forge either have forgotten it already or do not even bother to reimplement it.
Plan
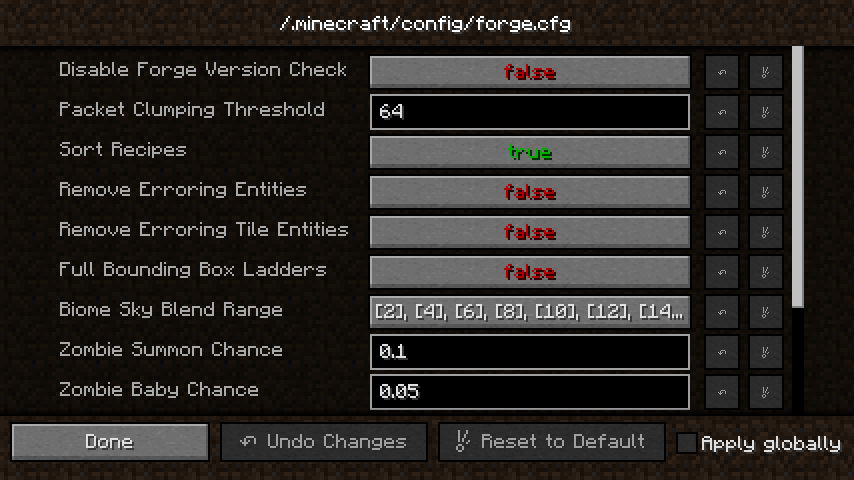
Manually recreating a Forge-style configuration screen, like the ones with “Undo Changes” and “Reset to Default” buttons shown above, might be complicated. But, that kind of configuration GUI might be an overkill; a simpler one like the settings screens of Minecraft itself should be sufficient for most users.
Minecraft Forge is shipped in companion with the Mod Coder Pack (MCP), which decompiles Minecraft and provides it as a library, so any Minecraft Forge mod can interface with classes of Minecraft directly, allowing us to mimic a Minecraft-style settings screen using Minecraft’s API.
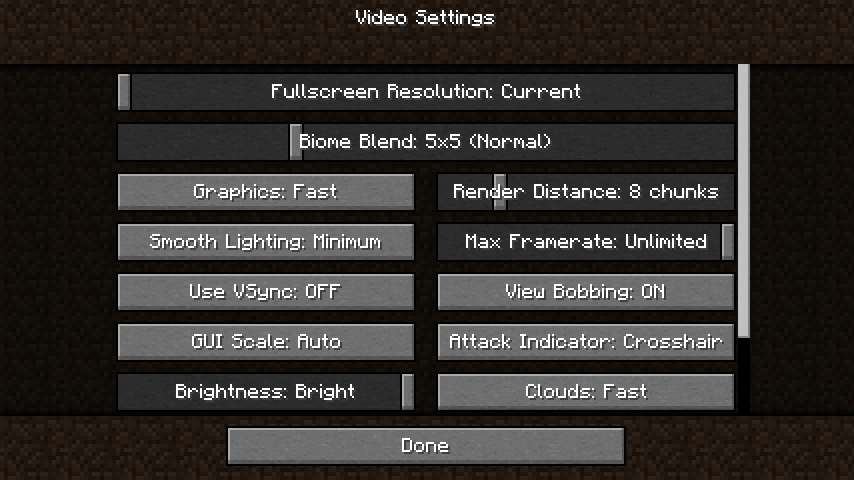
In the above screenshot of Minecraft video settings screen, we can see three types of widgets:
- Sliders, which are used for adjusting numerical values, like maximum framerate
- On/off buttons for toggling boolean values
- Buttons that cycle through lists of possible values, like GUI scale (auto, small, normal, and large) and attack indicator style (off, crosshair, hotbar)
All of HBW Helper configuration options’ values fell under one of those classes, so I could use the utilities Minecraft used to create those widgets for my mod’s own configuration GUI without reinventing the wheel.
Steps
The steps to create a configuration GUI for a Forge mod for Minecraft 1.14.4 and 1.15.x are creating a class for the GUI, registering a factory of the GUI, adding elements to be shown on the GUI, and connecting the GUI with the mod’s configuration back-end.
Create a Class for the Configuration GUI
There is an abstract class net.minecraft.client.gui.screen.Screen designated
as the base class for every screen in Minecraft, so my mod’s configuration GUI
would be a subclass of it.
The Screen class contains the following important members that its subclasses
might want to call or override:
protected Screen(ITextComponent title): the only constructorprotected void init(): performs initialization tasks of the screenpublic void render(int mouseX, int mouseY, float partialTicks): renders the screenpublic void onClose(): closes the screen and performs teardown tasks
So, I first created a very basic ConfigScreen class as follows:
import net.minecraft.client.gui.screen.Screen;
import net.minecraft.util.text.TranslationTextComponent;

public final class ConfigScreen extends Screen {
    /** Distance from top of the screen to this GUI's title */
    private static final int TITLE_HEIGHT = 8;

    public ConfigScreen() {
        // Use the super class' constructor to set the screen's title
        super(new TranslationTextComponent("hbwhelper.configGui.title",
                HbwHelper.NAME));
    }

    @Override
    public void render(int mouseX, int mouseY, float partialTicks) {
        // First draw the background of the screen
        this.renderBackground();
        // Draw the title
        this.drawCenteredString(this.font, this.title.getFormattedText(),
                this.width / 2, TITLE_HEIGHT, 0xFFFFFF);
        // Call the super class' method to complete rendering
        super.render(mouseX, mouseY, partialTicks);
    }
}
Register a Configuration GUI Factory
We need an entry point to the mod configuration screen so users can open it and customize mod settings. The proper way of doing this is to register a factory of the mod’s configuration screen with Minecraft Forge. After the factory is registered, the “Config” button in the mods list will be enabled so users can open up the configuration screen by clicking the button.
Configuration GUI factory registration should be done in the public constructor
of the mod’s main class, which is the class with the @Mod annotation.
import net.minecraftforge.fml.ExtensionPoint;
import net.minecraftforge.fml.ModLoadingContext;
import net.minecraftforge.fml.common.Mod;
import net.minecraftforge.fml.event.lifecycle.FMLClientSetupEvent;
import net.minecraftforge.fml.javafmlmod.FMLJavaModLoadingContext;

@Mod(HbwHelper.MOD_ID)
public final class HbwHelper {
    public static final String NAME = "HBW Helper";
    public static final String MOD_ID = "hbwhelper";

    public HbwHelper() {
        FMLJavaModLoadingContext.get().getModEventBus()
                .addListener(this::clientSetup);
        // Register the configuration GUI factory
        ModLoadingContext.get().registerExtensionPoint(
                ExtensionPoint.CONFIGGUIFACTORY,
                () -> (mc, screen) -> new ConfigScreen()
        );
    }

    private void clientSetup(FMLClientSetupEvent event) {
        ...
    }
}
Let us carefully examine the call to the registerExtensionPoint
method
and understand the arguments. The method’s signature is:
public <T> void registerExtensionPoint(ExtensionPoint<T> point,
                                       Supplier<T> extension)
The first parameter of this method requires an object of type
ExtensionPoint<T>. If you go to that
class,
you will find three instances of it stored as constants and a private
constructor which prevents any other instantiations of the class. It is similar
to an enum class with three constants, but because enum classes are not allowed
to have any type parameters, the authors of the class had to use pre-defined
constants and a private constructor to mimic a generic enum type.
The CONFIGGUIFACTORY instance, as suggested by its name, is the one we are
interested in:
public static final
ExtensionPoint<BiFunction<Minecraft, Screen, Screen>> CONFIGGUIFACTORY
        = new ExtensionPoint<>();
The type for ExtensionPoint’s type parameter <T> here is
BiFunction<Minecraft, Screen, Screen>.
BiFunction
is an interface in the Java API. It was introduced in Java 8 as a part of the
lambda expression feature. It represents a function that takes two input values
and outputs one result.
The type BiFunction<Minecraft, Screen, Screen> acts as the type of mod
configuration GUI factory here. Minecraft Forge gives a GUI factory the current
Minecraft instance and the screen from which the configuration GUI is opened
and expects it to return an instance of the configuration GUI. The factory can
either blindly return an instance without examining the arguments received from
Forge at all, or honor the arguments’ values and return a specialized instance
accordingly. The factory I wrote for my mod was (mc, screen) -> new ConfigScreen(), which is one that discards the input arguments. Note that a
lambda expression is used here. If you are not familiar with lambda
expressions, it might be a good idea to read more about them on the Internet.
The same type is also used for the type parameter <T> of the
registerExtensionPoint method, so for the second parameter of the method -
extension, we need a Supplier<BiFunction<Minecraft, Screen, Screen> - a
Supplier
of the mod configuration GUI factory. The Supplier interface represents a
function that takes no input and returns a value. Creating a simple Supplier
that always returns my configuration GUI factory with the lambda expression () -> (mc, screen) -> new ConfigScreen() did the job.
Add Basic UI Elements
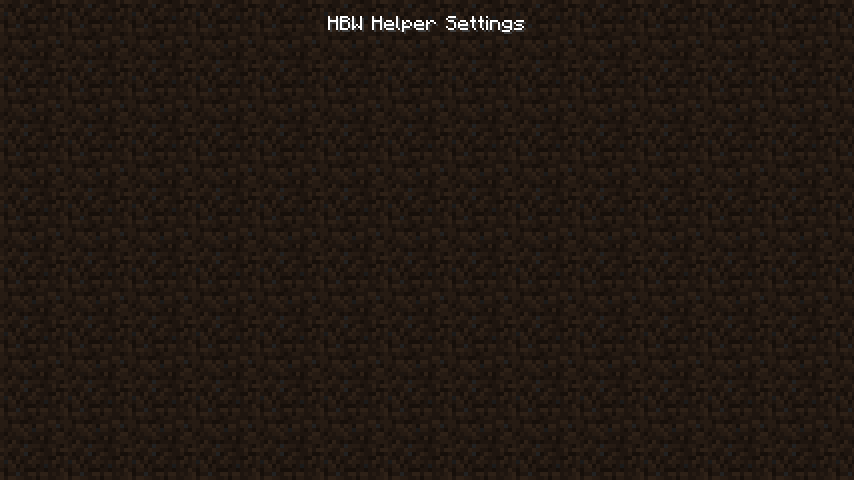
Once the configuration GUI factory is registered with Minecraft Forge, and the factory can create instances of the class for the GUI, we can visit it by clicking the “Config” button in the mods list.
Because nothing except the configuration screen’s title was added, the screen was not functional at all, and you could not even leave the screen without pressing Esc.
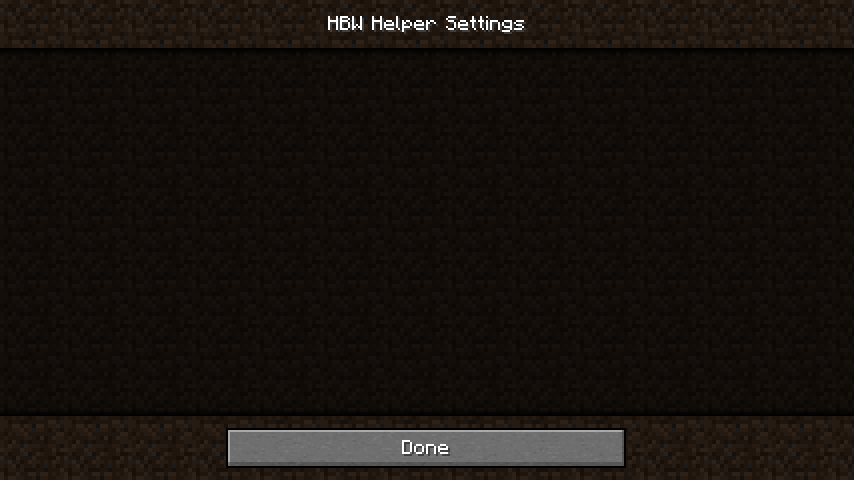
To complete a Minecraft-style settings screen, a container of the widgets in the center and a “Done” button on the bottom should be added.
The widget container is created from an instance of
net.minecraft.client.gui.widget.list.OptionsRowList. The name of
OptionsRowList is self-explanatory - it is a list of rows of options users
see in a settings screen. A row in the list may have one or two options.
For the “Done” button, Minecraft has a
net.minecraft.client.gui.widget.button.Button class, which can be used to
create it.
import net.minecraft.client.gui.widget.button.Button;
import net.minecraft.client.gui.widget.list.OptionsRowList;
import net.minecraft.client.resources.I18n;

import ...;

public final class ConfigScreen extends Screen {
    /** Distance from top of the screen to the options row list's top */
    private static final int OPTIONS_LIST_TOP_HEIGHT = 24;
    /** Distance from bottom of the screen to the options row list's bottom */
    private static final int OPTIONS_LIST_BOTTOM_OFFSET = 32;
    /** Height of each item in the options row list */
    private static final int OPTIONS_LIST_ITEM_HEIGHT = 25;

    /** Width of a button */
    private static final int BUTTON_WIDTH = 200;
    /** Height of a button */
    private static final int BUTTON_HEIGHT = 20;
    /** Distance from bottom of the screen to the "Done" button's top */
    private static final int DONE_BUTTON_TOP_OFFSET = 26;

    /** List of options rows shown on the screen */
    // Not a final field because this cannot be initialized in the constructor,
    // as explained below
    private OptionsRowList optionsRowList;

    ...

    @Override
    protected void init() {
        // Create the options row list
        // It must be created in this method instead of in the constructor,
        // or it will not be displayed properly
        this.optionsRowList = new OptionsRowList(
                this.minecraft, this.width, this.height,
                OPTIONS_LIST_TOP_HEIGHT,
                this.height - OPTIONS_LIST_BOTTOM_OFFSET,
                OPTIONS_LIST_ITEM_HEIGHT
        );

        // Add the options row list as this screen's child
        // If this is not done, users cannot click on items in the list
        this.children.add(this.optionsRowList);

        // Add the "Done" button
        this.addButton(new Button(
                (this.width - BUTTON_WIDTH) / 2,
                this.height - DONE_BUTTON_TOP_OFFSET,
                BUTTON_WIDTH, BUTTON_HEIGHT,
                // Text shown on the button
                I18n.format("gui.done"),
                // Action performed when the button is pressed
                button -> this.onClose()
        ));
    }

    @Override
    public void render(int mouseX, int mouseY, float partialTicks) {
        this.renderBackground();
        // Options row list must be rendered here,
        // otherwise the GUI will be broken
        this.optionsRowList.render(mouseX, mouseY, partialTicks);
        this.drawCenteredString(this.font, this.title.getFormattedText(),
                this.width / 2, TITLE_HEIGHT, 0xFFFFFF);
        super.render(mouseX, mouseY, partialTicks);
    }
}
The comments I added in this code snippet should explain the usage of those
classes and some caveats. However, I would like to give a special remark on the
last argument for the constructor of Button. It requires an object of type
Button.IPressable, which is an interface defined as follows:
public interface IPressable {
    void onPress(Button button);
}
This interface is used to define the callback function when a button is
pressed. Put whatever code to be executed in an implementation of this
interface, then pass it to Button’s constructor. When the button is pressed,
the onPress method of the Button object will be called, with the button
argument being that Button object itself.
For the “Done” button, when it is pressed, we would want the settings screen to
be closed, so I added a call to the Screen.onClose method in the button’s
callback function’s body. In addition, IPressable is effectively a
functional interface because it has only one abstract method, so I can
implement it easily with a lambda expression button -> this.onClose().
The configuration GUI screen now has a complete skeleton, so it is time to add the widgets for options.
Add Widgets for Controlling Configuration Values
The values of my mod’s options fall under three types: booleans, numbers, and
enum constants. For each of those types, Minecraft provides a specialized
widget in the net.minecraft.client.settings package:
-
BooleanOptionfor options whose possible values are just “on” and “off”. -
SliderPercentageOptionfor options with numeric values. Although its name says “percentage”, it still works for options with arbitrary range and unit. -
IteratableOptionfor options with a limited set of allowed values, like an array of strings, or all constants of an enum class.
BooleanOption
Let us start from BooleanOption, which is the easiest one to use. The
signature of the class’ only constructor is:
public BooleanOption(String translationKey,
                     Predicate<GameSetting> getter,
                     BiConsumer<GameSettings, Boolean> setter)
Defining a BooleanOption is as easy as specifying the translation key of the
option’s name, a getter of the option’s current value, and a setter for
changing the value. But the types of the getter and the setter can be
confusing, so we will look at them in depth.
Both of them are objects of generic types with one type parameter being
net.minecraft.client.GameSettings. That is a class Minecraft uses to
represent its own game settings. The getter is a
Predicate,
which accepts a value and returns a boolean. The setter is a
BiConsumer,
which takes in two values, does something about them, but returns nothing.
The BooleanOption class was designed to interact with the game settings of
Minecraft itself: the getter takes in a GameSettings object, finds the
current value of a setting from that object, and returns it; the setter accepts
the GameSettings object to update and the new value of an option to change.
However, because the GameSettings class is specialized for Minecraft’s
options, we cannot use it for a mod’s settings. What we can do for a mod’s
settings, though, is to ignore any GameSettings arguments and connect the
getter and the setter directly to the object that represents the mod’s
settings.
For the example below, assume the mod has a ModSettings class that contains
static methods for retrieving and changing values of the mod’s options.
    @Override
    protected void init() {
        this.optionsRowList = new OptionsRowList(
                this.minecraft, this.width, this.height,
                OPTIONS_LIST_TOP_HEIGHT,
                this.height - OPTIONS_LIST_BOTTOM_OFFSET,
                OPTIONS_LIST_ITEM_HEIGHT
        );

        // Add options after the options row list is created

        this.optionsRowList.addOption(new BooleanOption(
                "hbwhelper.configGui.showArmorInfo.title",
                // GameSettings argument unused for both getter and setter
                unused -> ModSettings.getShowArmorInfo(),
                (unused, newValue) -> ModSettings.setShowArmorInfo(newValue)
        ));

        this.children.add(this.optionsRowList);

        ...
    }
SliderPercentageOption
The SliderPercentageOption class is a little bit more complicated. We can see
this simply from the number of parameters in its constructor and their types:
public SliderPercentageOption(String translationKey,
                              double minValue,
                              double maxValue,
                              float stepSize,
                              Function<GameSettings, Double> getter,
                              BiConsumer<GameSettings, Double> setter,
                              BiFunction<GameSettings, SliderPercentageOption, String> getDisplayString)
The ideas behind the getter and setter for this class are similar to those for
BooleanOption except that Predicate<GameSettings> becomes
Function<GameSettings, Double>.
If you consider Predicate<GameSettings> as Function<GameSettings, Boolean>
then this should create no surprise at all. So, let us look at the other
additional parameters for this class.
The minValue and maxValue parameters can be used to set the range of
accepted values for this option. Their type is double so you can use decimal
numbers for the value, but you may use integers as well. The stepSize
controls the minimal change in the option’s value when the user drags the
slider. If your option’s value must be an integer, then passing 1.0F through
this parameter will impose the limit. Otherwise, choose whatever value that is
appropriate.
The most interesting parameter here is getDisplayString, a BiFunction that
returns the string representation shown for this option. BooleanOption does
not ask for this because it has a default string representation in the format
of <name>: [ON|OFF]. SliderPercentageOption does not have such a default
representation and relies on the programmer to determine one. The BiFunction
I came up with to generate the same style of string representation is (gs, option) -> option.getDisplayString() + option.get(gs).
For the example below, assume ModSettings.getHudX returns an int, and
ModSettings.setHudX requires an int argument.
        // Add an integer option
        // For a decimal number option, remember to remove casts,
        // and change the step's value if necessary
        this.optionsRowList.addOption(new SliderPercentageOption(
                "hbwhelper.configGui.hudX.title",
                // Range: 0 to width of game window
                0.0, this.width,
                // This is an integer option, so allow whole steps only
                1.0F,
                // Getter and setter are similar to those in BooleanOption
                unused -> (double) ModSettings.getHudX(),
                (unused, newValue) -> ModSettings.setHudX(newValue.intValue()),
                // BiFunction that returns a string in format "<name>: <value>"
                (gs, option) -> option.getDisplayString() + (int) option.get(gs)
        ));
IteratableOption
The constructor of IteratableOption is similar to the one of BooleanOption.
Note that the order of getter and setter parameters is swapped here.
public IteratableOption(String translationKey,
                        BiConsumer<GameSettings, Integer> setter,
                        BiFunction<GameSettings, IteratableOption, String> getter)
The IteratableOption class does not care about the type of allowed values for
an option; it only tracks the index of the selected value in the iteration
sequence. This is why the setter is expected to take in an integer instead of
an object of a generic type. Therefore, to use it, you need to define how the
set of allowed values for such an option is indexed. For arrays and lists, you
can use their indices for this purpose directly. For enum constants, you can
define the indices with
Enum.ordinal().
When the option is changed, the setter receives an integer which, when added to the option’s current value’s index, becomes the index of the option’s new value in the general case. The setter is responsible for calculating the new value’s index and reflecting the change in the underlying configuration. In particular, careful handling of edge cases when the iteration is started over is required. The programmer should avoid out-of-bound indices and reset the index to 0 when needed.
The getter, on the other hand, is a BiFunction that returns a string instead
of an integer. It was intended to directly return the string representation of
the option and its value to be displayed to the user, not the index of the
current value, or even the object that represents the value. Its purpose is the
same as the getDisplayString argument in the constructor of
SliderPercentageOption.
Although this kind of design makes the API harder to understand and use, at
least it allows the IteratableOption to care nothing about the set of allowed
values for an option, including information like how many values are in the
set, and what each value’s string representation is.
The following example works with an option whose allowed values are constants
from an enum class called DreamMode in my mod. The source code of that class
can be found
here.
        // Add an option whose allowed values are an enum class' constants
        this.optionsRowList.addOption(new IteratableOption(
                "hbwhelper.configGui.dreamMode.title",
                (unused, newValue) ->
                        // Every enum class has an implicit static method
                        // 'values()', which returns an array containing
                        // every constant of the enum type
                        ModSettings.setDreamMode(DreamMode.values()[
                                (ModSettings.getDreamMode().ordinal() + newValue)
                                    // Handle the edge case of starting over
                                        % DreamMode.values().length
                        ]),
                (unused, option) -> option.getDisplayString() +
                        I18n.format(ModSettings.getDreamMode().getTranslateKey())
        ));
Saving the Options
If the mod’s configuration needs to be saved manually by calling a method, then
override the Screen.onClose method and insert the method call into it:
import ...;

public final class ConfigScreen extends Screen {
    ...

    @Override
    public void onClose() {
        // Save mod configuration
        ModSettings.save();
        super.onClose();
    }
}
Correctly Exit to the Parent Screen
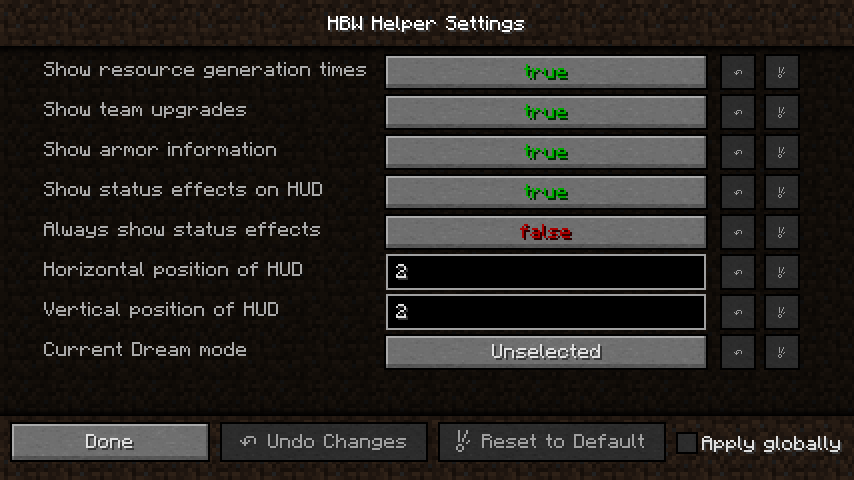
Now that the option widgets have been added, the mod configuration GUI looks very complete.
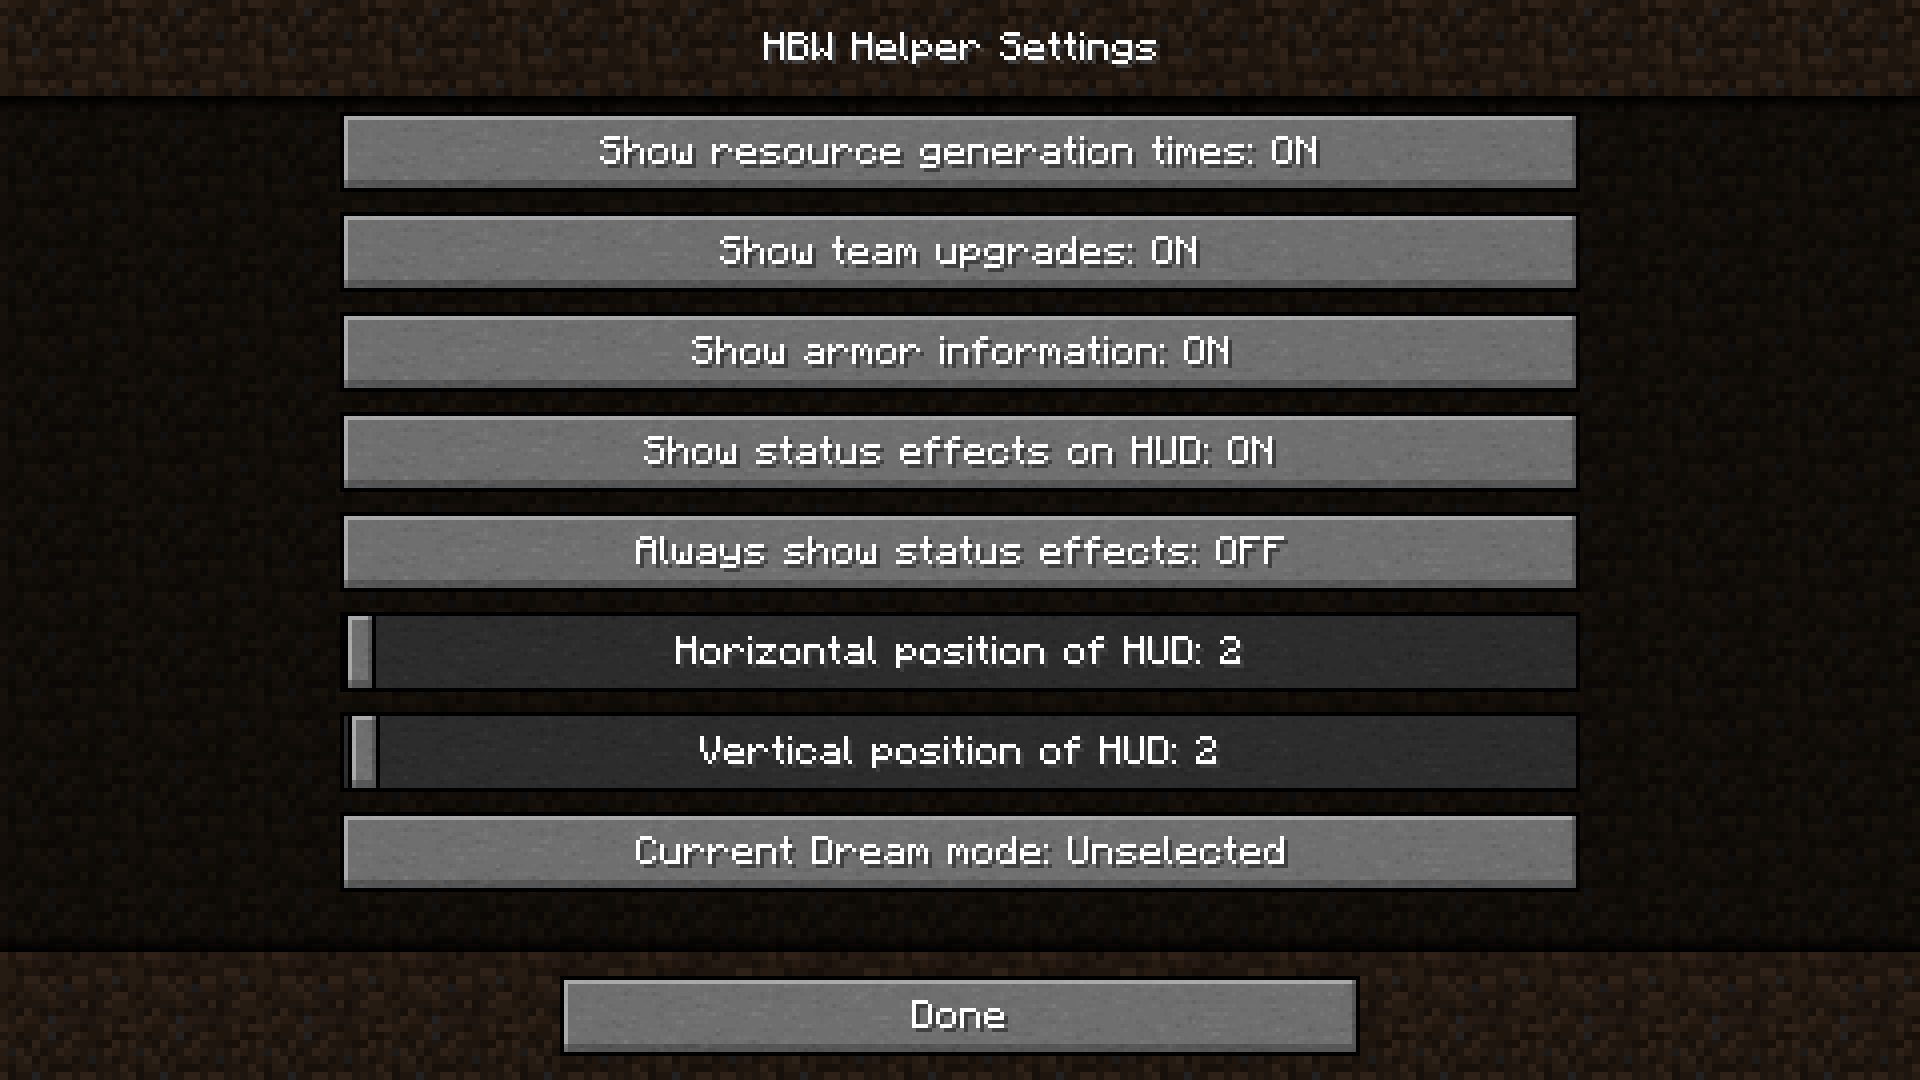
There is only one small imperfection with this GUI: when the user clicks on the “Done” button, the game does not go back to the mods list screen from which the GUI was opened, but the main menu of the game instead. If this is not the desired behavior to you, then tracking the parent screen when the GUI is being created and returning back to it when the GUI is closed will fix it.
To track the parent screen, add a parameter for it in the configuration GUI’s constructor, and save it in a field. When the GUI is being closed, display the parent screen.
import ...;

public final class ConfigScreen extends Screen {
    ...

    /** The parent screen of this screen */
    private final Screen parentScreen;

    public ConfigScreen(Screen parentScreen) {
        super(new TranslationTextComponent("hbwhelper.configGui.title",
                HbwHelper.NAME));
        this.parentScreen = parentScreen;
    }

    ...

    @Override
    public void onClose() {
        ModSettings.save();
        // Display the parent screen
        this.minecraft.displayGuiScreen(parentScreen);
    }
}
After this change is made, do not forget to change the configuration GUI factory as well, because the constructor’s signature has been altered:
          ModLoadingContext.get().registerExtensionPoint(
                  ExtensionPoint.CONFIGGUIFACTORY,
-                 () -> (mc, screen) -> new ConfigScreen()
+                 () -> (mc, screen) -> new ConfigScreen(screen)
          );
More Resources
If you want to look at a full example of a configuration GUI class created with this method, please visit the source code of my mod’s configuration screen here.
You can also find and read the source code of the following classes in your IDE, they contain more sample code that uses the APIs mentioned in this post. The source code was generated during the decompilation process of Minecraft when you set up your mod’s workspace.
net.minecraft.client.gui.screen.VideoSettingsScreennet.minecraft.client.settings.AbstractOption