Add a Language Switcher
Your site is now serving in more than one language, and each version can be accessed by appending the language code to your site’s domain. When people want to change to another language, they must edit the URL manually and go to that page. This can be inconvenient when they cannot remember the language code or when the URL is too long.
One possible solution is to add a language selector to your site and put it in a prominent place. It not only eases navigation in your site but also let visitors know that contents are available in other languages.
In this section, you will see how to add a language selector to your site. I would call it a language switcher rather than a mere selector, as it will allow the visitors to change to another language while staying on the same page.
Create a Basic Switcher
A language selector should provide a link for every supported language. The
list of supported languages can be retrieved via variable site.languages. We
will first try to print each element in the list on the home page. Add this to
index.md, index.markdown, or whatever file for the contents in the home
page:
{% for lang in site.languages %}
{{ lang }}
{% endfor %}
Next, we can add URLs to different versions of the current page. Recall that in
the URL, the language code is included except for the default language. For
example, if your website supports en, es, de, fr and uses en as
default, then the relative links of pages in each language start with /,
/es, /de, and /fr respectively. This means that a way to detect if a
language is the default one is needed. It can be done easily by comparing the
language code with site.default_lang:
{% for lang in site.languages %}
    {% if lang == site.default_lang %}
{{ lang }} (Default)
    {% else %}
{{ lang }}
    {% endif %}
{% endfor %}
Let’s add in the links. The following snippet demonstrates doing this in HTML,
but you can also add it into a Markdown file as well. Note that a space is
added to href=" {{ page.url }}", between the quotation mark and the left
curly brace. This space is used to disable Polyglot’s URL
relativizing:
without it, Polyglot will still prepend the active language code /{{ lang }}
to the URL, which effectively creates a link to the same webpage, in the same
language.
{% for lang in site.languages %}
    {% if lang == site.default_lang %}
<a href=" {{ page.url }}">{{ lang }}</a>
    {% else %}
<a href="/{{ lang }}{{ page.url }}">{{ lang }}</a>
    {% endif %}
{% endfor %}
Don’t Add Link for the Current Language
There is no point to link a page to itself, so the link to the page in the current active language is not needed.
The current language’s code can be accessed via site.active_lang. When
iterating through all supported languages, if a language is found to be the
active one, then we don’t generate a link for it.
{% for lang in site.languages %}
    {% if lang == site.active_lang %}
{{ lang }}
    {% else %}
        {% if lang == site.default_lang %}
<a href=" {{ page.url }}">{{ lang }}</a>
        {% else %}
<a href="/{{ lang }}{{ page.url }}">{{ lang }}</a>
        {% endif %}
    {% endif %}
{% endfor %}
Replace Language Code with Name
The ISO 639-1 language codes themselves may give people a clue on what that language is, but to make our site look more professional and neat, let’s replace the language code in the switcher with their name.
First, each language’s name should be defined. We can add a language’s name to
the l10n.yml file for it, which would already have the lozalized site title
if you followed the previous section’s instruction:
site-root/_data$ cat en/l10n.yml
lang_name: "English"
title: "My Site"
site-root/_data$ cat zh/l10n.yml
lang_name: "中文"
title: "本人的网站"
The active language’s name can be accessed via site.data.l10n.lang_name; to
get a specific language’s name, use site.data[lang].l10n.lang_name, where
lang stores the language’s code.
We can now update the language switcher to use this variable. Because it is long and is used more than once, we will store it in a new local variable.
{% for lang in site.languages %}
    {% assign lang_name = site.data[lang].l10n.lang_name %}
    {% if lang == site.active_lang %}
{{ lang_name }}
    {% else %}
        {% if lang == site.default_lang %}
<a href=" {{ page.url }}">{{ lang_name }}</a>
        {% else %}
<a href="/{{ lang }}{{ page.url }}">{{ lang_name }}</a>
        {% endif %}
    {% endif %}
{% endfor %}
Add Language Switcher to Every Page
Because we want the visitors be able to switch to another language on any page,
the language switcher should be included in every page. And yes, the best way
to do this is to put the switcher into a file in the _includes directory and
then {% include %} from elsewhere.
Create a file lang-switcher.html under _includes and move the language
switcher into it. You can now include the language switcher anywhere you want
by with {% include lang-switcher.html %}.
For example, let’s try to put the language switcher in the footer. Edit
_includes/footer.html and include the language switcher somewhere
appropriate:
             {%- if site.email -%}
             <li><a class="u-email" href="mailto:{{ site.email }}">{{ site.email }}</a></li>
             {%- endif -%}
         </ul>
+        <div class="lang-switcher">
+          {%- include lang-switcher.html -%}
+        </div>
       </div>

       <div class="footer-col footer-col-2">
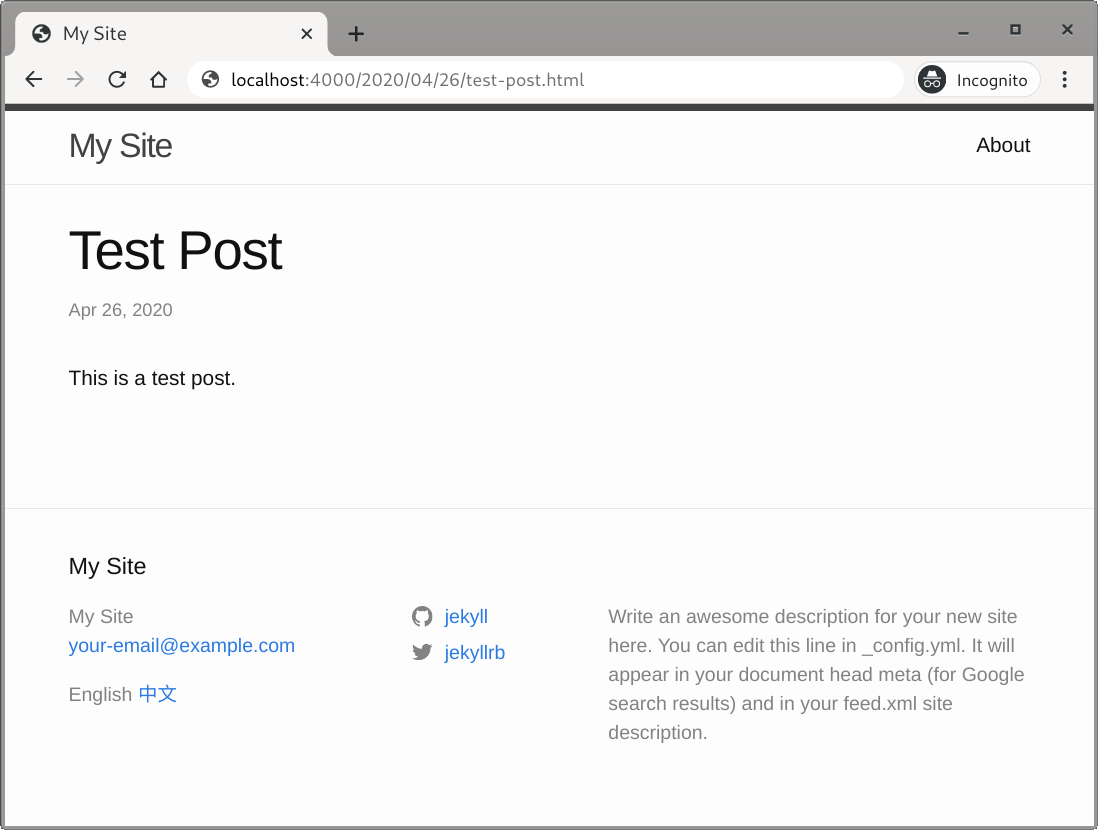
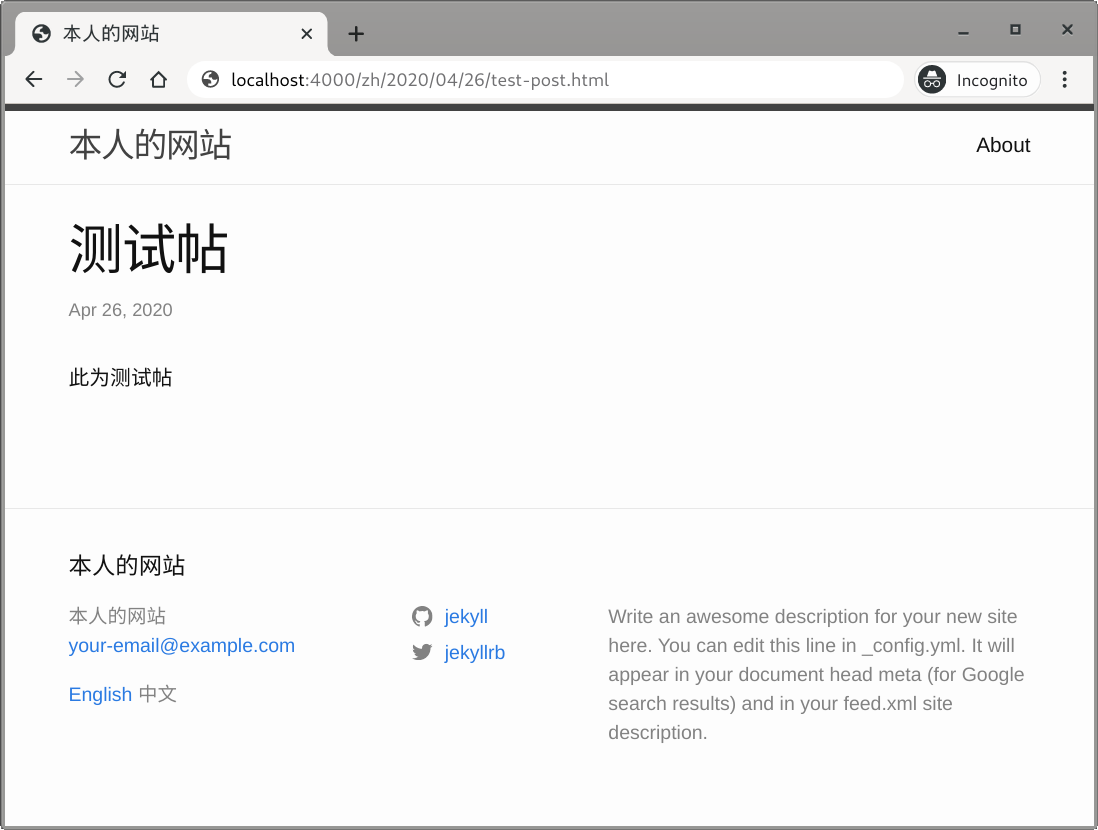
Visit any of your site’s pages written in more than one language, and click on each option in the language switcher. You should see the contents changing to another language but you are still staying on the same page.