Host the Site on GitHub Pages
After making those enhancements, your site is ready to serve to people using different languages with both the contents and site elements localized. A popular choice of services for hosting a Jekyll site is GitHub Pages, but in our situation, things are going to work a little bit differently. In this section, we will address some issues you might face when you host the site on GitHub Pages.
Use of Unsupported Jekyll Plugins
If you want GitHub Pages to automatically build the Jekyll site and host it for
you, the site must not use any plugin that is not on this
list. As of this collection is written,
Polyglot is not on the list. In this case, GitHub Pages’ help
article
suggests you build your site locally, then push what is under the _site
directory to GitHub.
This does not mean the site must be built on your personal computer, however; thanks to a lot of continuous integration apps on GitHub, you can set up a CI environment to let it build your site every time you push new commits and publish the generated static files to GitHub Pages.
Your workflow would not change significantly. Suppose you don’t use unsupported plugins for your site so that it can be built by GitHub Pages itself. Once you change your site’s source files, you would create commits and push them, then the updated site would be available in a moment. If you use CI, then you commit and push as usual. All CI services supporting GitHub should be able to capture a push event, and if set up properly, build and publish your site automatically after the push.
Back in the old days, I would use Travis CI for this purpose. Now, GitHub has introduced Actions, which has CI capabilities. It can be used to complete the job of building and publishing a Jekyll site and is a built-in tool of GitHub, so I chose it for my personal site.
Set Up a GitHub Actions Workflow
A GitHub Actions workflow is like a procedure to complete some tasks. We should
define a workflow that will build the Jekyll site and push the generated static
files to GitHub. To create a workflow, first make a .github/workflows
directory under your Git repository’s root. Each workflow should have an
associated YAML file under the directory, which will define its rules,
environments, and procedures.
Create a Workflow
A good starting point of the workflow for building a Jekyll site is
here.
You may copy the file’s contents into a YAML file under .github/workflows and
start customizing it.
name: Jekyll site CI

on:
  push:
    branches: [ $default-branch ]
  pull_request:
    branches: [ $default-branch ]

jobs:
  build:

    runs-on: ubuntu-latest

    steps:
    - uses: actions/checkout@v2
    - name: Build the site in the jekyll/builder container
      run: |
        docker run \
        -v ${{ github.workspace }}:/srv/jekyll -v ${{ github.workspace }}/_site:/srv/jekyll/_site \
        jekyll/builder:latest /bin/bash -c "chmod 777 /srv/jekyll && jekyll build --future"
Some important options in this configuration file are:
-
on: Defines when the workflow will be triggered. -
jobs: A general task for the workflow. More details can be found here. Note that job executions are isolated, as the GitHub Help article says “each job in a workflow runs in a fresh instance of a virtual environment.” -
steps: Smaller and more specific tasks for a job. Two types of steps can be seen here:-
Reused actions, which have a
usesattribute. The code and scripts for the task are packaged into an Action or a Docker image. For instance, theactions/checkout@v2used here is a packaged Action that clones your repository to the workflow’s virtual environment instance. -
User-defined commands, specified with
runattribute. Such step runs one or multiple commands in the virtual environment instance.
-
When used without any modification, the workflow above will check out your
GitHub repository and run a build of your site using files in that repository
in a Docker container created from the jekyll/builder
image. Since we also want to publish
the generated site after building it, we need to add another step which
will push the static site files to GitHub. We can’t add a job for this purpose
because jobs are isolated, so what is built by the build job cannot be
accessed from other jobs. The step can simply run a set of commands that push
the static files to GitHub.
Enter the Default Branch’s Name
In the configuration file, $default-branch should be replaced by the actual
name of your Git repository’s default branch.
You can use whatever name you prefer for the default branch. For demonstration
purpose, I would pick jekyll here.
  on:
    push:
-     branches: [ $default-branch ]
+     branches: [ jekyll ]
    pull_request:
-     branches: [ $default-branch ]
+     branches: [ jekyll ]
Add Step for Site Uploading
If you were not using unsupported Jekyll plugins so that you could push your site’s static files to GitHub directly and let GitHub Pages build the site, you would never see the generated static files of your site. To achieve the same effect with the GitHub Actions workflow, we will avoid uploading the static files to the default branch of the Git repository for the site, so those files will never pop into the working tree that is full of source files.
The most straightforward way of doing this is to dedicate a gh-pages branch
for the static files, and let GitHub Pages use that branch as the publishing
source. Your site’s source files will stay in the default branch, so when
anyone clones the repository, the Git working tree will consist exclusively of
the source files, and they can start working on them immediately. As long as
the gh-pages branch is not checked out, the generated static files are
hidden.
If you are familiar with Docker and its command line interface, you will notice
that the docker command in the workflow above mounts the _site directory
under github.workspace (which is simply your Git repository’s root) to the
_site directory that will be generated during the build in the container,
which means the site’s static files will be accessible from ${{ github.workspace }}/_site after the build. So, the following commands should
push what’s under _site after the build to your repository’s gh-pages
branch:
cd ${{ github.workspace }}/_site
git init -b gh-pages
git remote add origin https://github.com/${{ github.repository }}.git
git add .
git commit -m "Deploy site built from commit ${{ github.sha }}"
git push -u origin gh-pages
However, this is not going to work for the following reasons:
-
The
_sitedirectory is created in the Docker container, possibly by a Linux user with another user ID, so we might get a “permission denied” error when runninggit initin it. We need to obtain the permission to that directory. In this example, we get the permission by acquiring ownership of the directory withchownto preserve file permission settings. -
In the virtual environment instance on GitHub Actions, Git user name and email are not configured, which will prevent
git commitfrom running successfully. -
We need to configure GitHub log in credentials to push.
-
Because we initialize a new Git repository under
_site, it does not have any commit history. This makes any commit we create in the virtual environment instance unrelated to the commit history on GitHub, and our push will fail. So, a force push is required.
To solve these issues, we need to add some extra commands to this task and change some existing ones:
+ sudo chown $( whoami ):$( whoami ) ${{ github.workspace }}/_site
  cd ${{ github.workspace }}/_site
  git init -b gh-pages
+ git config user.name ${{ github.actor }}
+ git config user.email ${{ github.actor }}@users.noreply.github.com
- git remote add origin https://github.com/${{ github.repository }}.git
+ git remote add origin https://x-access-token:${{ github.token }}@github.com/${{ github.repository }}.git
  git add .
  git commit -m "Deploy site built from commit ${{ github.sha }}"
- git push -u origin gh-pages
+ git push -f -u origin gh-pages
By adding x-access-token:${{ github.token }} before GitHub’s domain, a token
can be used to authenticate operations on the GitHub repository. github.token
gives a temporary token created before the job begins. It is the same as the
GITHUB_TOKEN, whose details are available
here.
Once we have come up with all the commands needed to publish the site, we can add them to the workflow file:
steps:
- uses: actions/checkout@v2
- name: Build the site in the jekyll/builder container
run: |
docker run \
-v ${{ github.workspace }}:/srv/jekyll -v ${{ github.workspace }}/_site:/srv/jekyll/_site \
jekyll/builder:latest /bin/bash -c "chmod 777 /srv/jekyll && jekyll build --future"
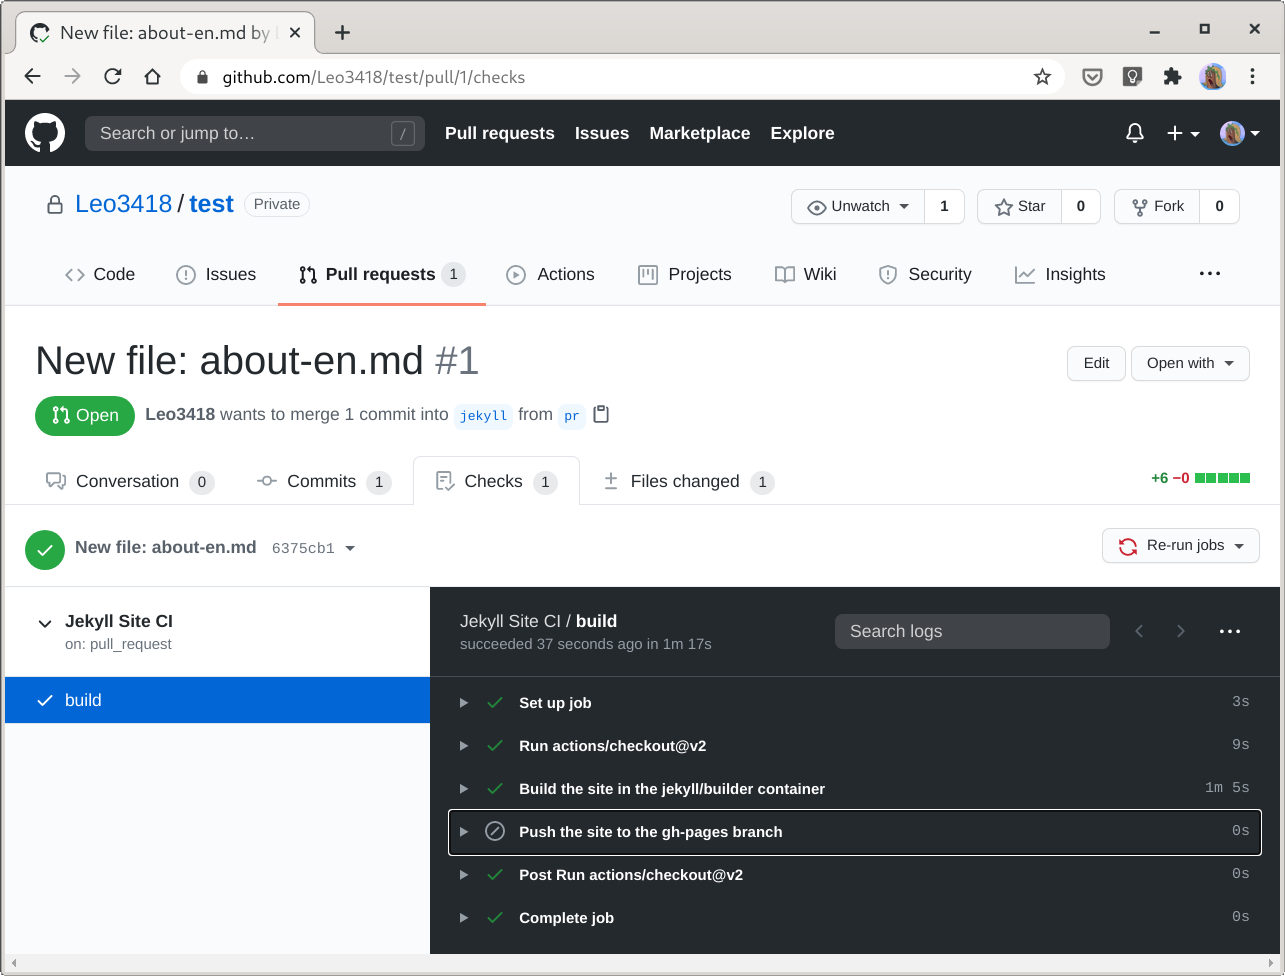
- name: Push the site to the gh-pages branch
run: |
sudo chown $( whoami ):$( whoami ) ${{ github.workspace }}/_site
cd ${{ github.workspace }}/_site
git init -b gh-pages
git config user.name ${{ github.actor }}
git config user.email ${{ github.actor }}@users.noreply.github.com
git remote add origin https://x-access-token:${{ github.token }}@github.com/${{ github.repository }}.git
git add .
git commit -m "Deploy site built from commit ${{ github.sha }}"
git push -f -u origin gh-pagesPrevent Unauthorized Modifications to Your Site
There is still a fatal vulnerability in the workflow. It can be triggered by a pull request, and since it unconditionally publishes the site built from the commit triggering it as long as the build is successful, it is possible that someone modifies your site merely with a pull request.
Anyone can fork the repository for your GitHub Pages site, modify the contents in their fork, send a pull request back to you, which triggers a run of your workflow, and the changes they have made are immediately published to your site even before you merge the pull request. The best thing that could happen thanks to this is that when others fix typos on your site, the correction is immediately online; the worst case would be someone posting malicious contents on your site.
To prevent such modifications, we can add a condition to the step that pushes
the generated site to gh-pages so that it is only performed if the workflow
run is triggered by a push to the jekyll branch.
      - name: Push the site to the gh-pages branch
+       if: ${{ github.event_name == 'push' }}
        run: |
          sudo chown $( whoami ):$( whoami ) ${{ github.workspace }}/_site
          cd ${{ github.workspace }}/_site
          git init -b gh-pages
For other kinds of events, including pull requests, the step will be skipped,
so the published site in the gh-pages branch is intact.
At this point, you should have produced a workflow file similar to mine. Now you have a GitHub Actions workflow that allows you to host a Jekyll site using unsupported plugins on GitHub Pages with automated builds.
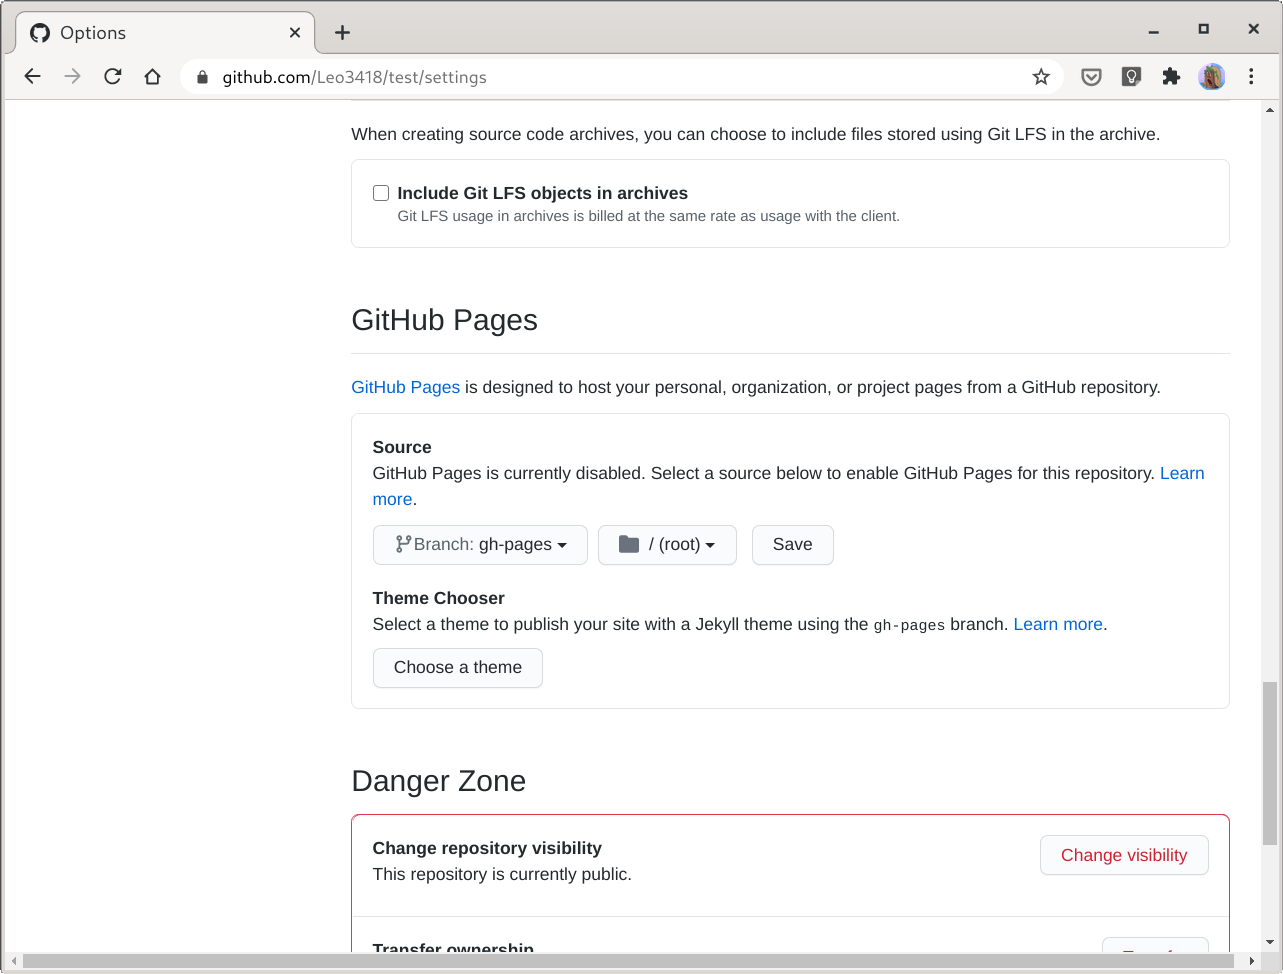
Set the Publishing Source of GitHub Pages
The last step is to tell GitHub Pages to use the files in the gh-pages branch
for your site. First, commit your changes and push them to GitHub, and let the
workflow run so it can push the generated files to gh-pages.
Next, go to the settings page of your repository on GitHub website, and scroll
down to the section called “GitHub Pages”. From there, select the gh-pages
branch as the source, and then click “Save”.